Create and Schedule an Email Campaign
You can send a one-time email by creating your own message or starting with a pre-written email from the content library. Both options allow you to customize the email and choose which contacts should receive it.
IN THIS ARTICLE
- Video Walkthrough
- Start a New Email
- Option 1: Use an Email from the Content Library
- Option 2: Create Your Own Email
- Edit Your Email
- Schedule or Send Your Email
If you're new to email marketing, starting with a template from the content library is often the fastest option.
Video Walkthrough
Watch the video below for a step-by-step walkthrough of creating and scheduling an email campaign.
Start a New Email
To begin creating a one-time email:
1. Log in to your dashboard
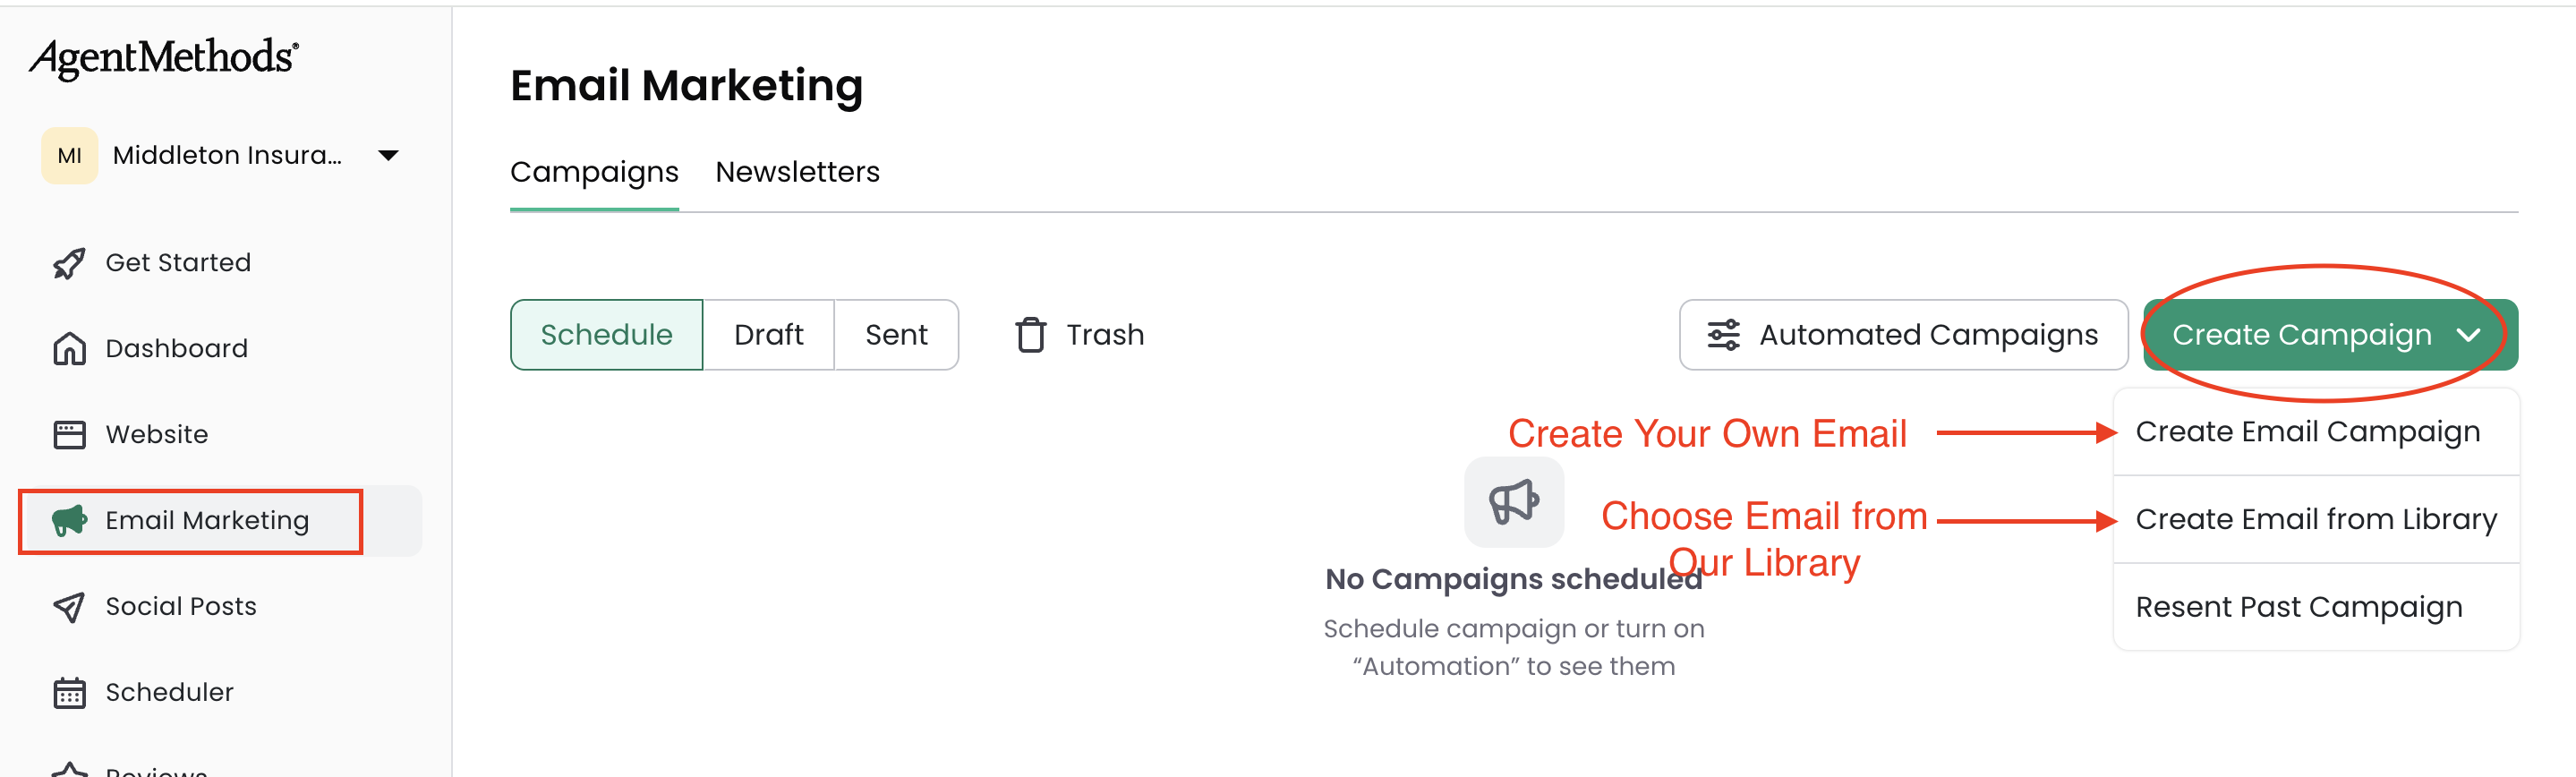
2. Click Email Marketing in the left-hand menu
3. Click Create Campaign
4. Choose one of the following options:
- Create an Email Campaign – create an email from scratch
- Create Email from Library – start with a pre-written email template
Option 1: Use an Email from the Content Library
The content library includes pre-written email templates you can use as a starting point.
To use a template:
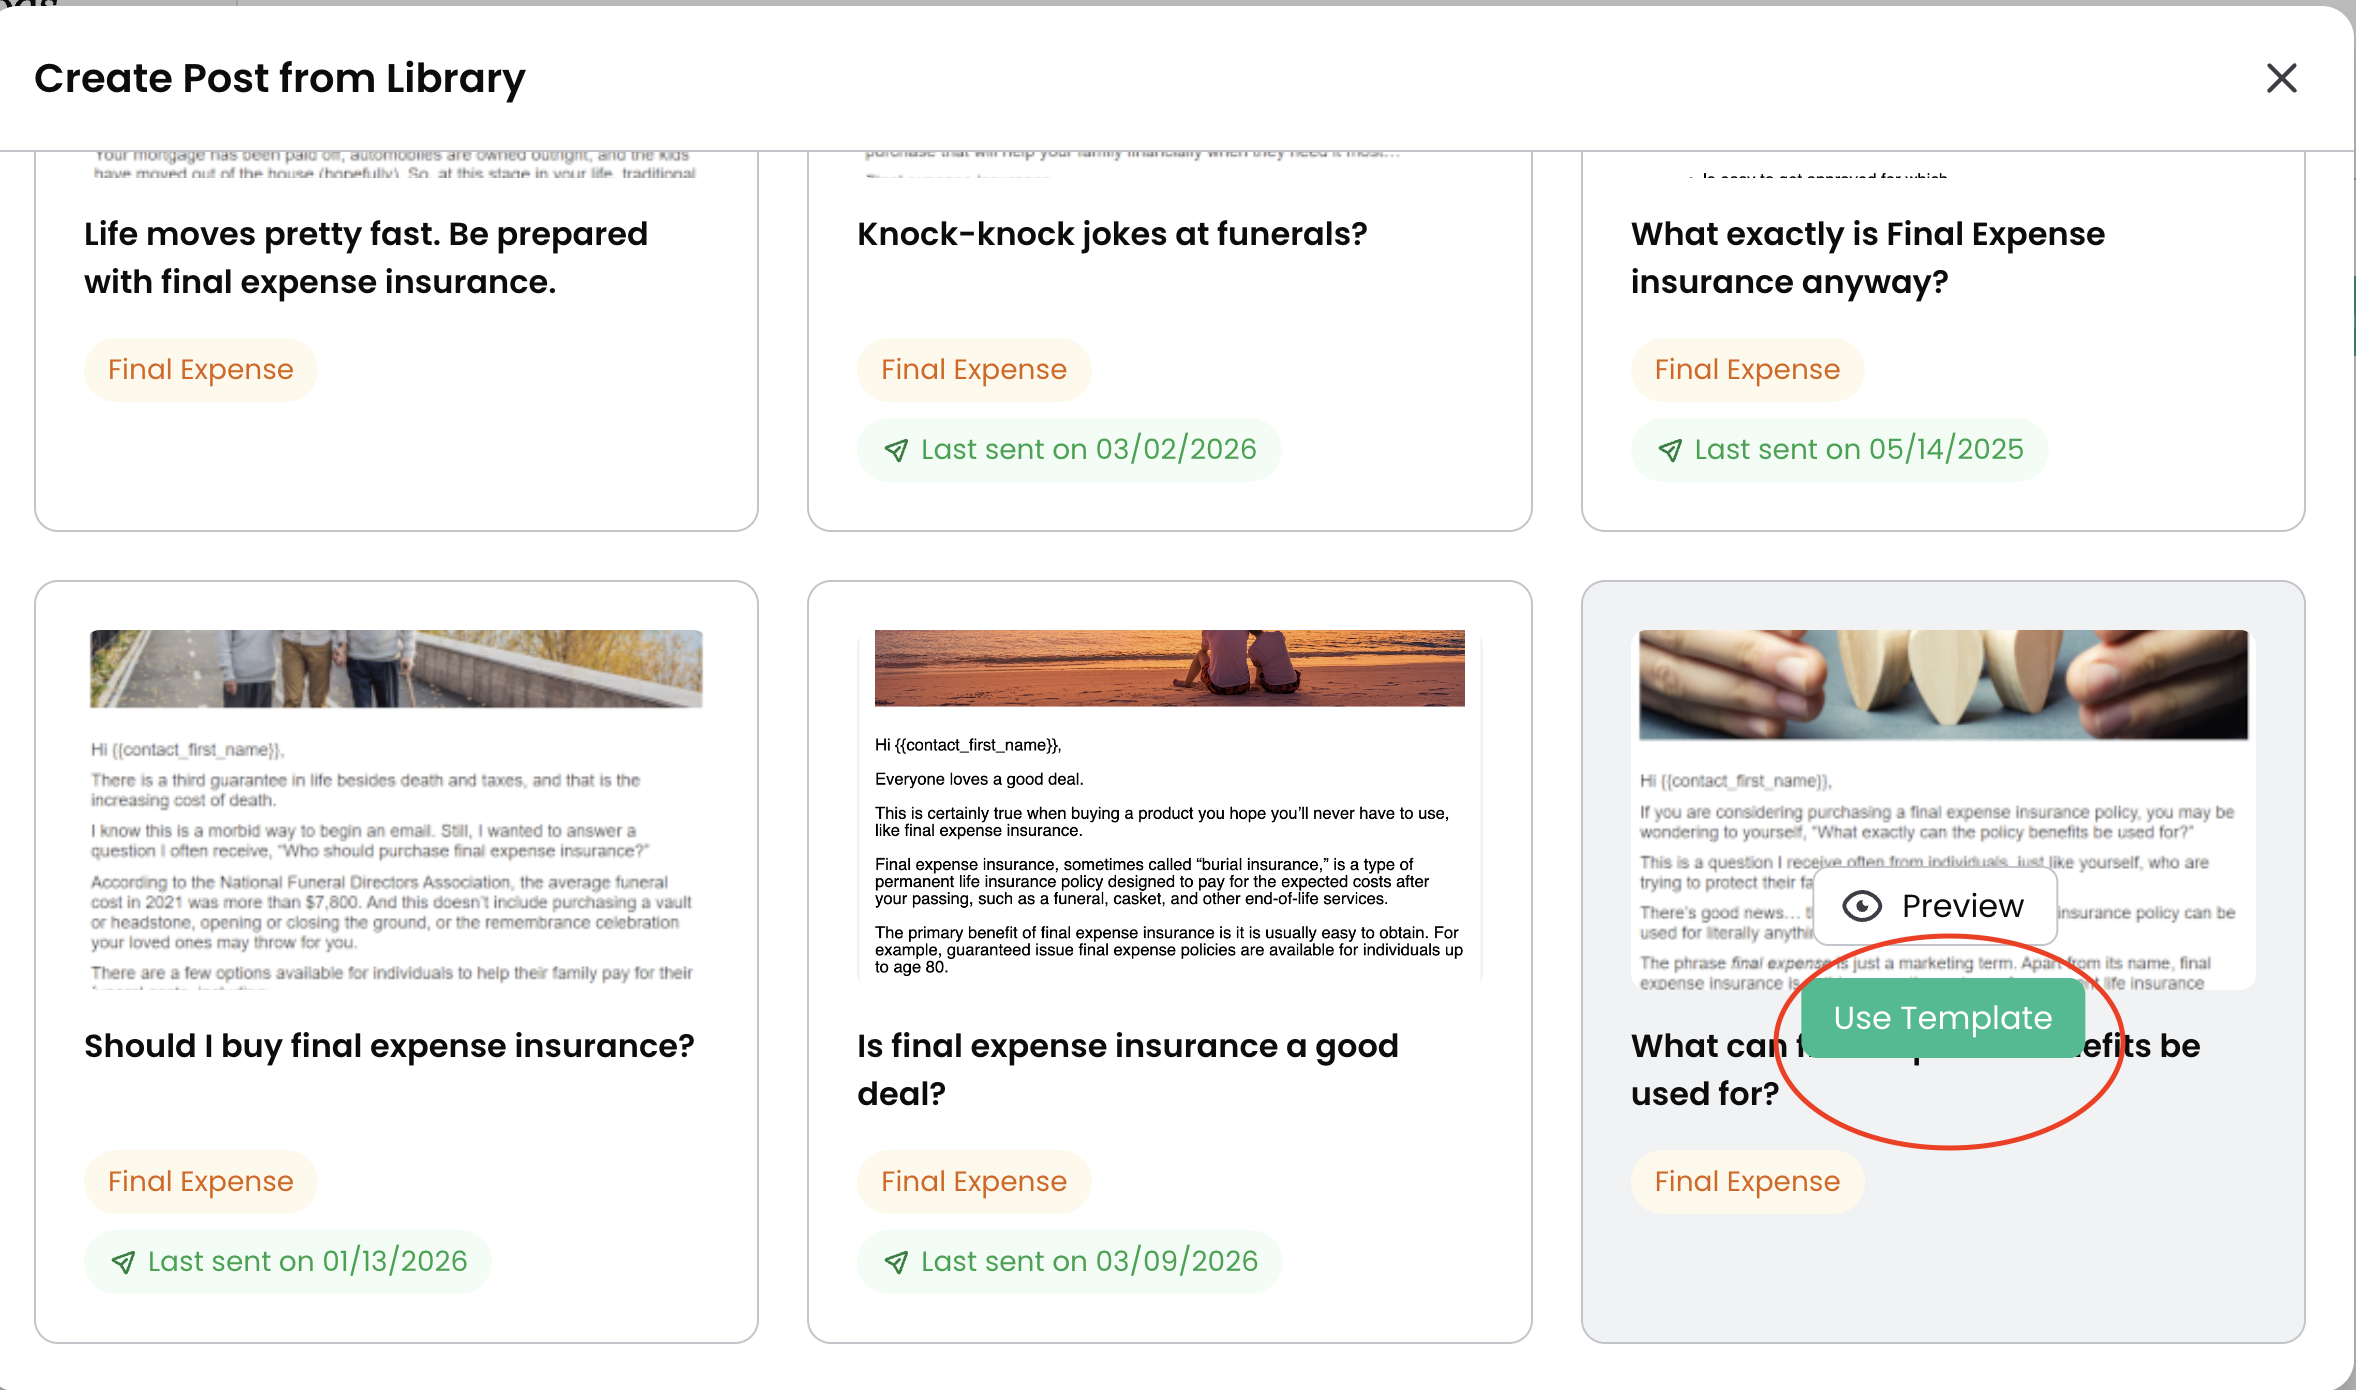
1. Click Create Email from Library
2. Select All Categories to browse available email categories
3. Preview the emails in that category
4. Click Use Template for the email you want to send
Most templates may include a landing page that the email links to. You can edit the landing page, use it as provided, or choose not to use it.
When you're ready, click Continue.
Option 2: Create Your Own Email
If you prefer to write your own message, select Create an Email Campaign.
From there you can build your email from scratch, including adding your own subject line, message, and links.
Edit Your Email
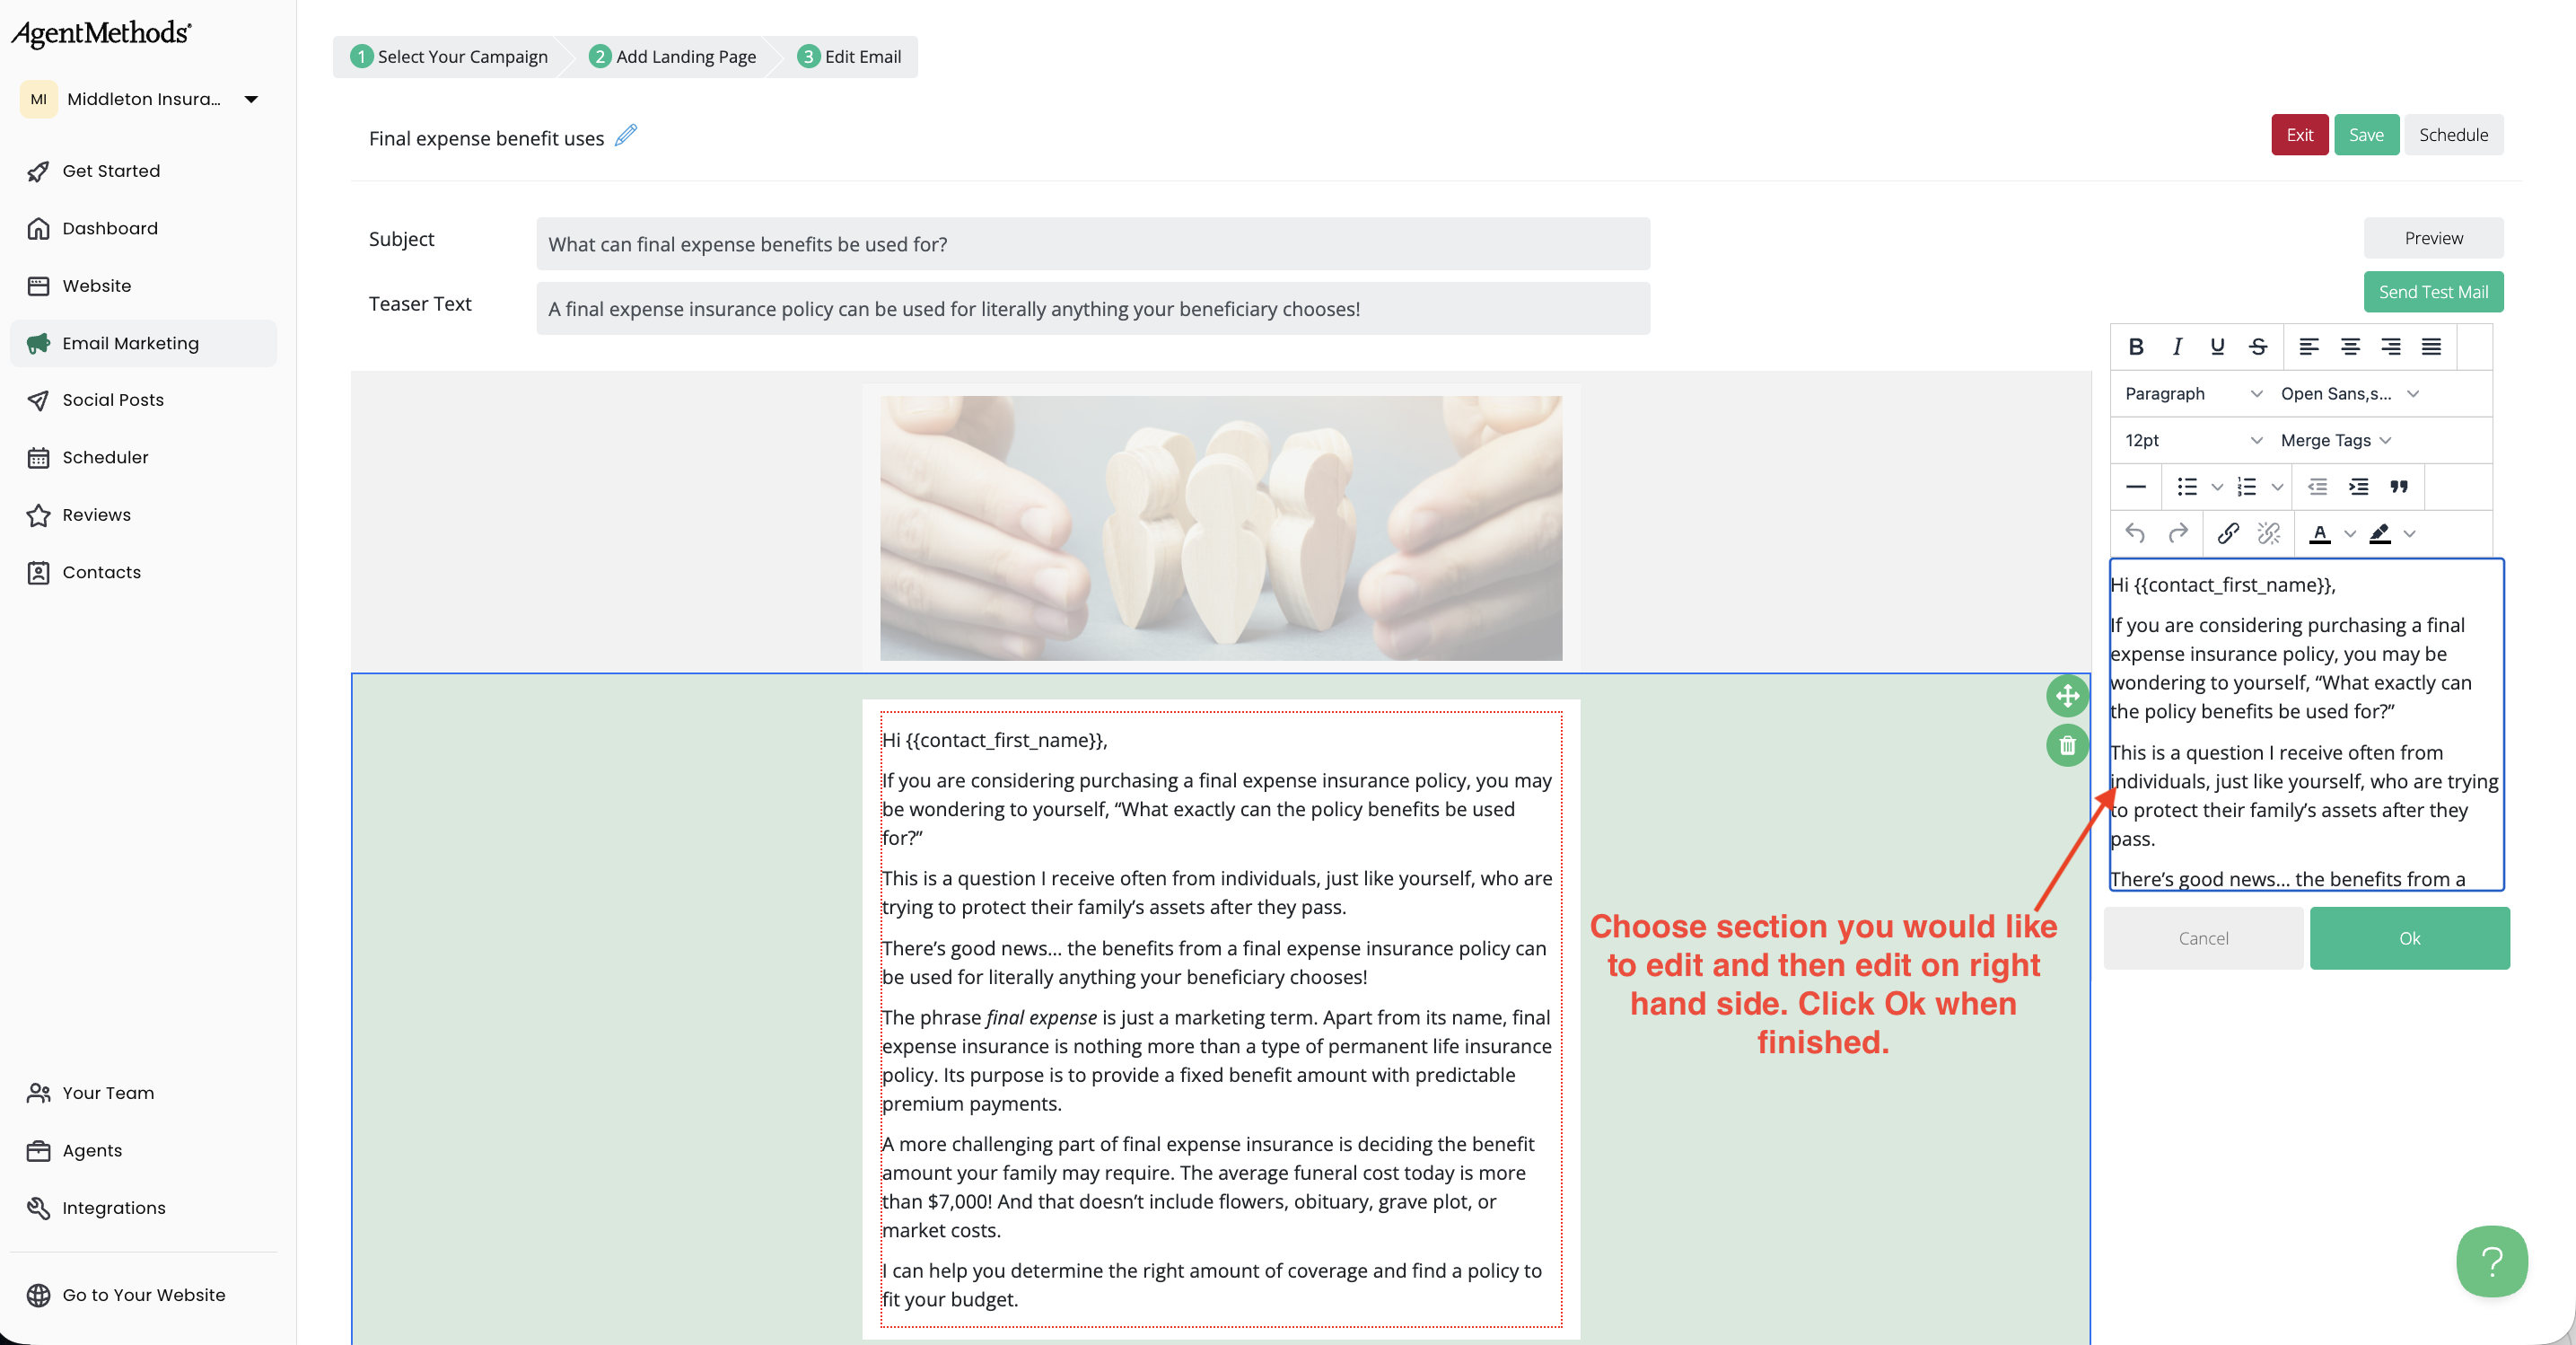
Once the email editor opens, you can customize each section of the email.
Click on a section to edit it. The editing options will appear on the right-hand side.
You can update:
- Email text
- Buttons
- Links
- Images
Before sending, it's always a good idea to preview the email or send a test email to make sure everything looks correct.
Schedule or Send Your Email
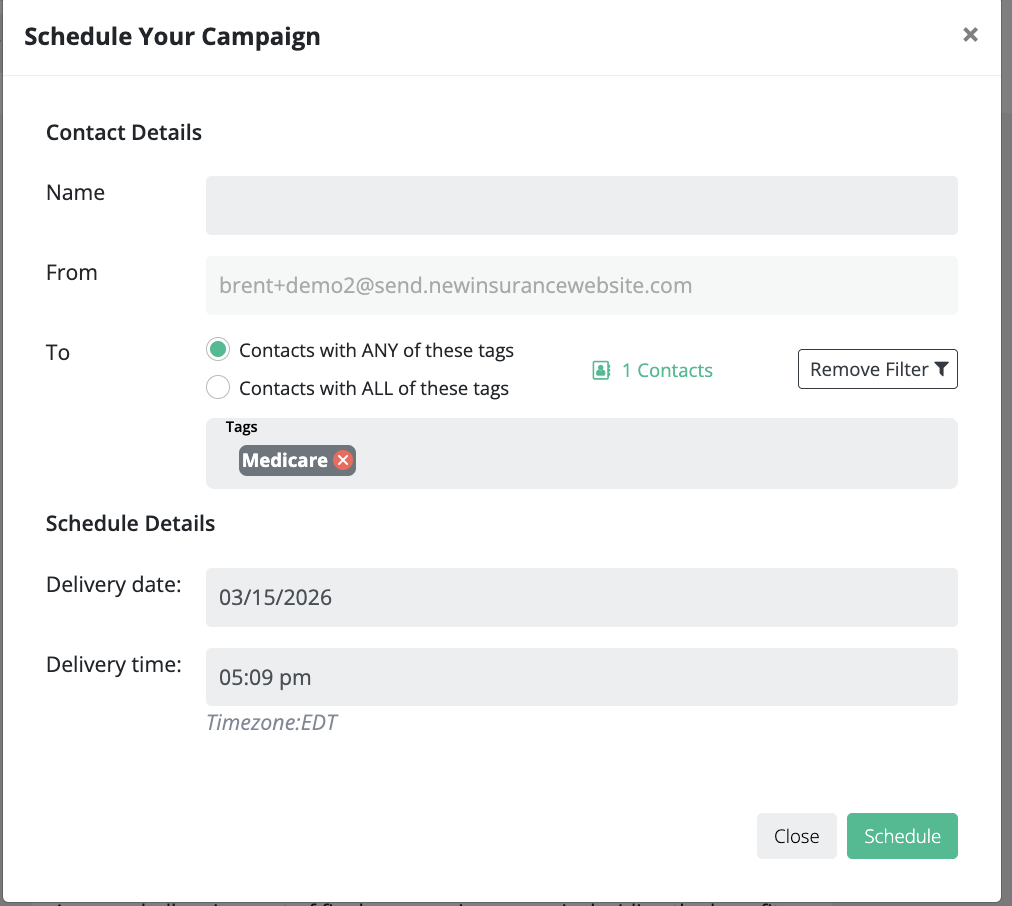
When your email is ready, click Schedule.
From here you can:
- Select who should receive the email
- Segment contacts using filters such as tags
- Choose the date and time the email should be sent
Click Apply Filter if you want to target a specific group of contacts.
Once the schedule is confirmed, the email will appear in your scheduled campaigns.
If you click Save instead of scheduling, the email will be stored in your draft folder so you can finish it later.
Still have questions? Our support team is happy to help 🙂