Add or Remove Website Pages
Your website is made up of pages organized into sections, such as your homepage, about page, or product pages. This guide will show you how to add new pages from the library, remove pages you do not need, and reorder pages within a section.
IN THIS ARTICLE
Tip: Your page library makes it easy to build out your website and customize which pages appear on your site.
Video Walkthrough
Watch the video below for a full walkthrough of how to add, remove, and reorder pages on your website.
Add a Page from the Library
You can add new pages to your website using the built-in page library.
To add a page:
1. Log in to your dashboard
2. Click Website in the left-hand menu
3. Select Manage Pages
4. Choose the section where you want to add the page
5. Click Add Page in the top right
6. Select Add Page from Library
7. Choose a category
8. Select a page from the library and click the + sign to add it
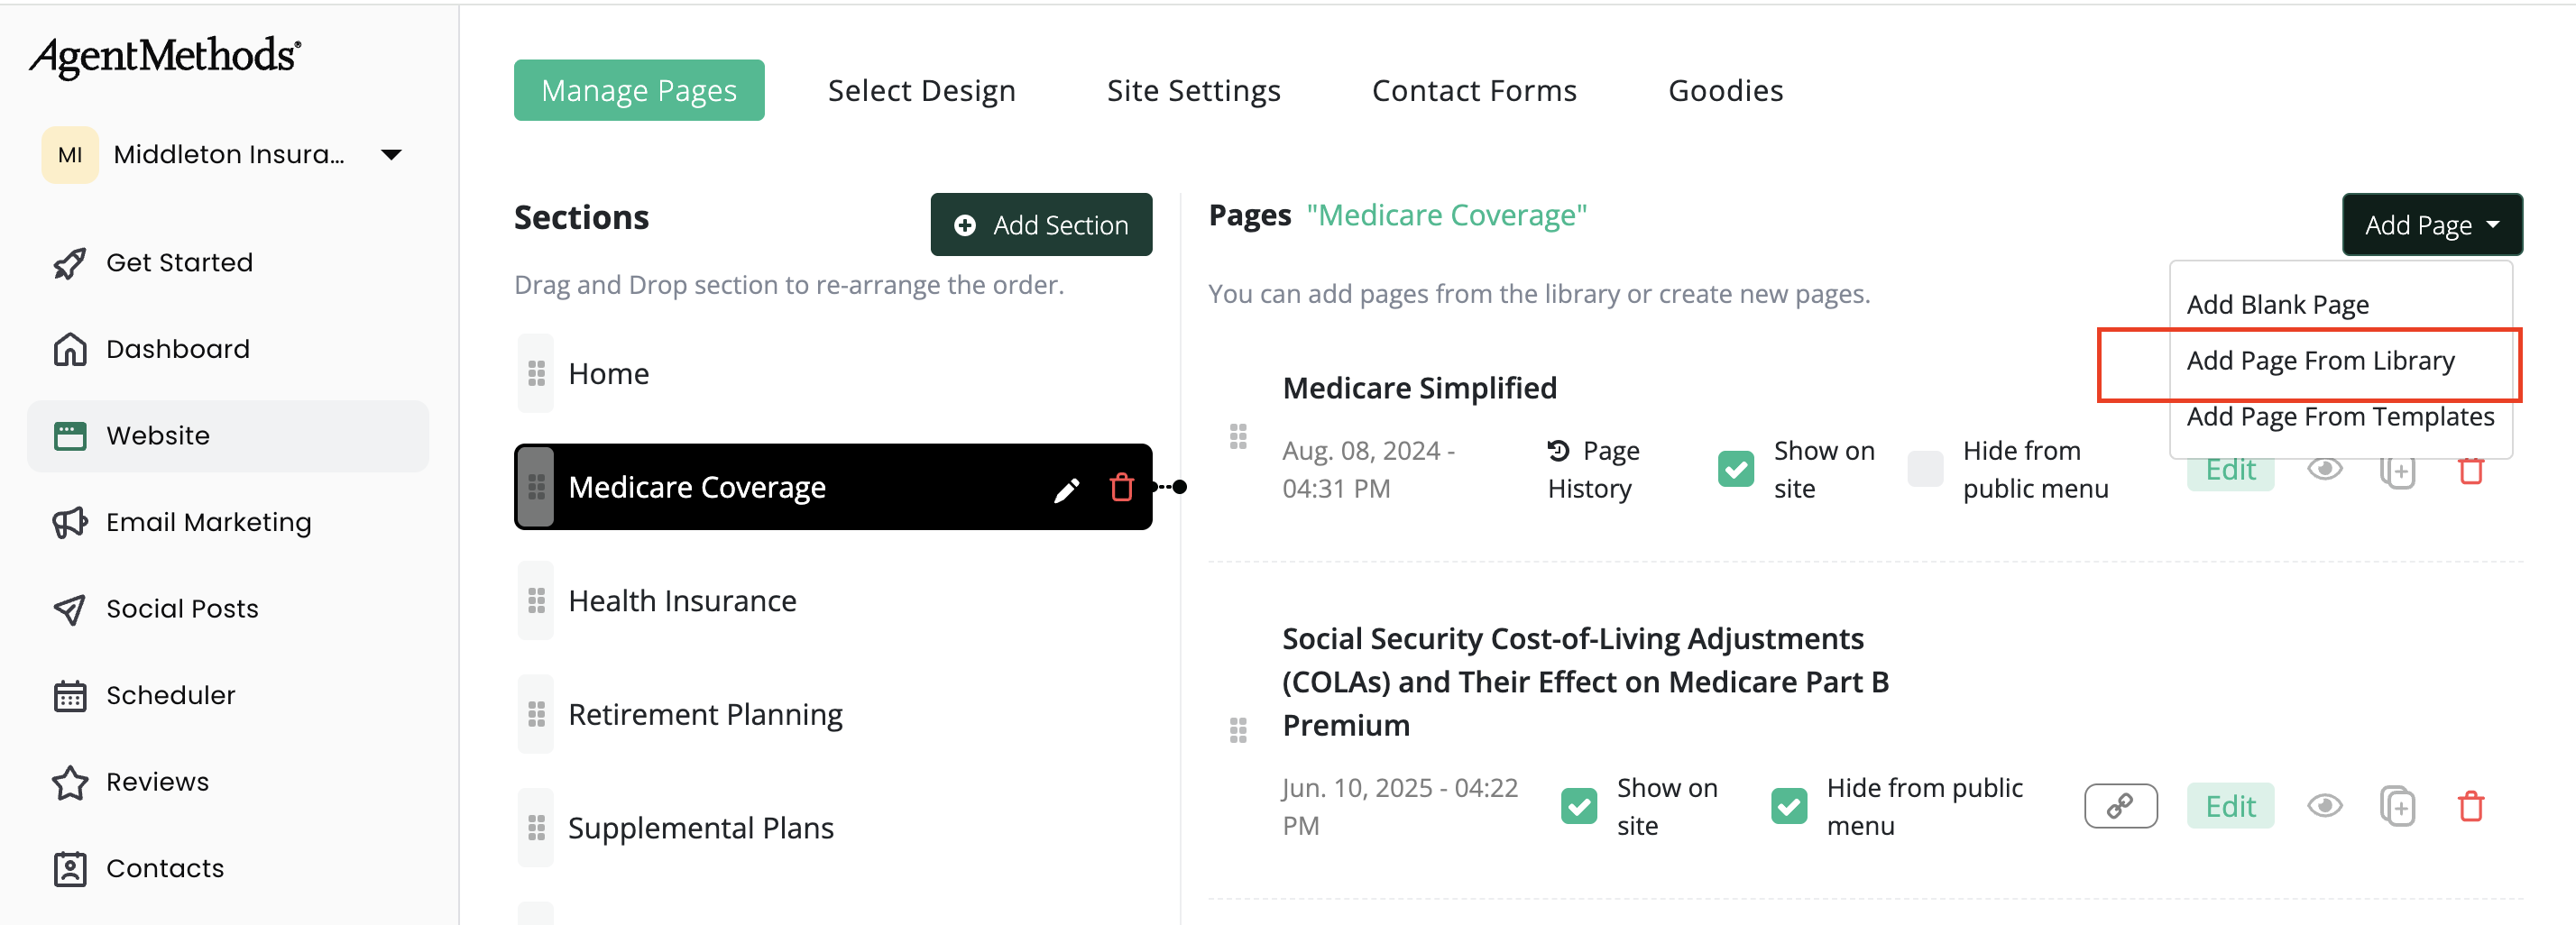
If a page in the library has a check mark, that means it has already been added to that section.
Delete a Page
If there is a page you no longer want on your website, you can remove it.
To delete a page:
1. Go to Manage Pages
2. Choose the section that contains the page you want to delete
3. Find the page you want to remove
4. Click the trash can icon to the far right
5. Confirm the deletion
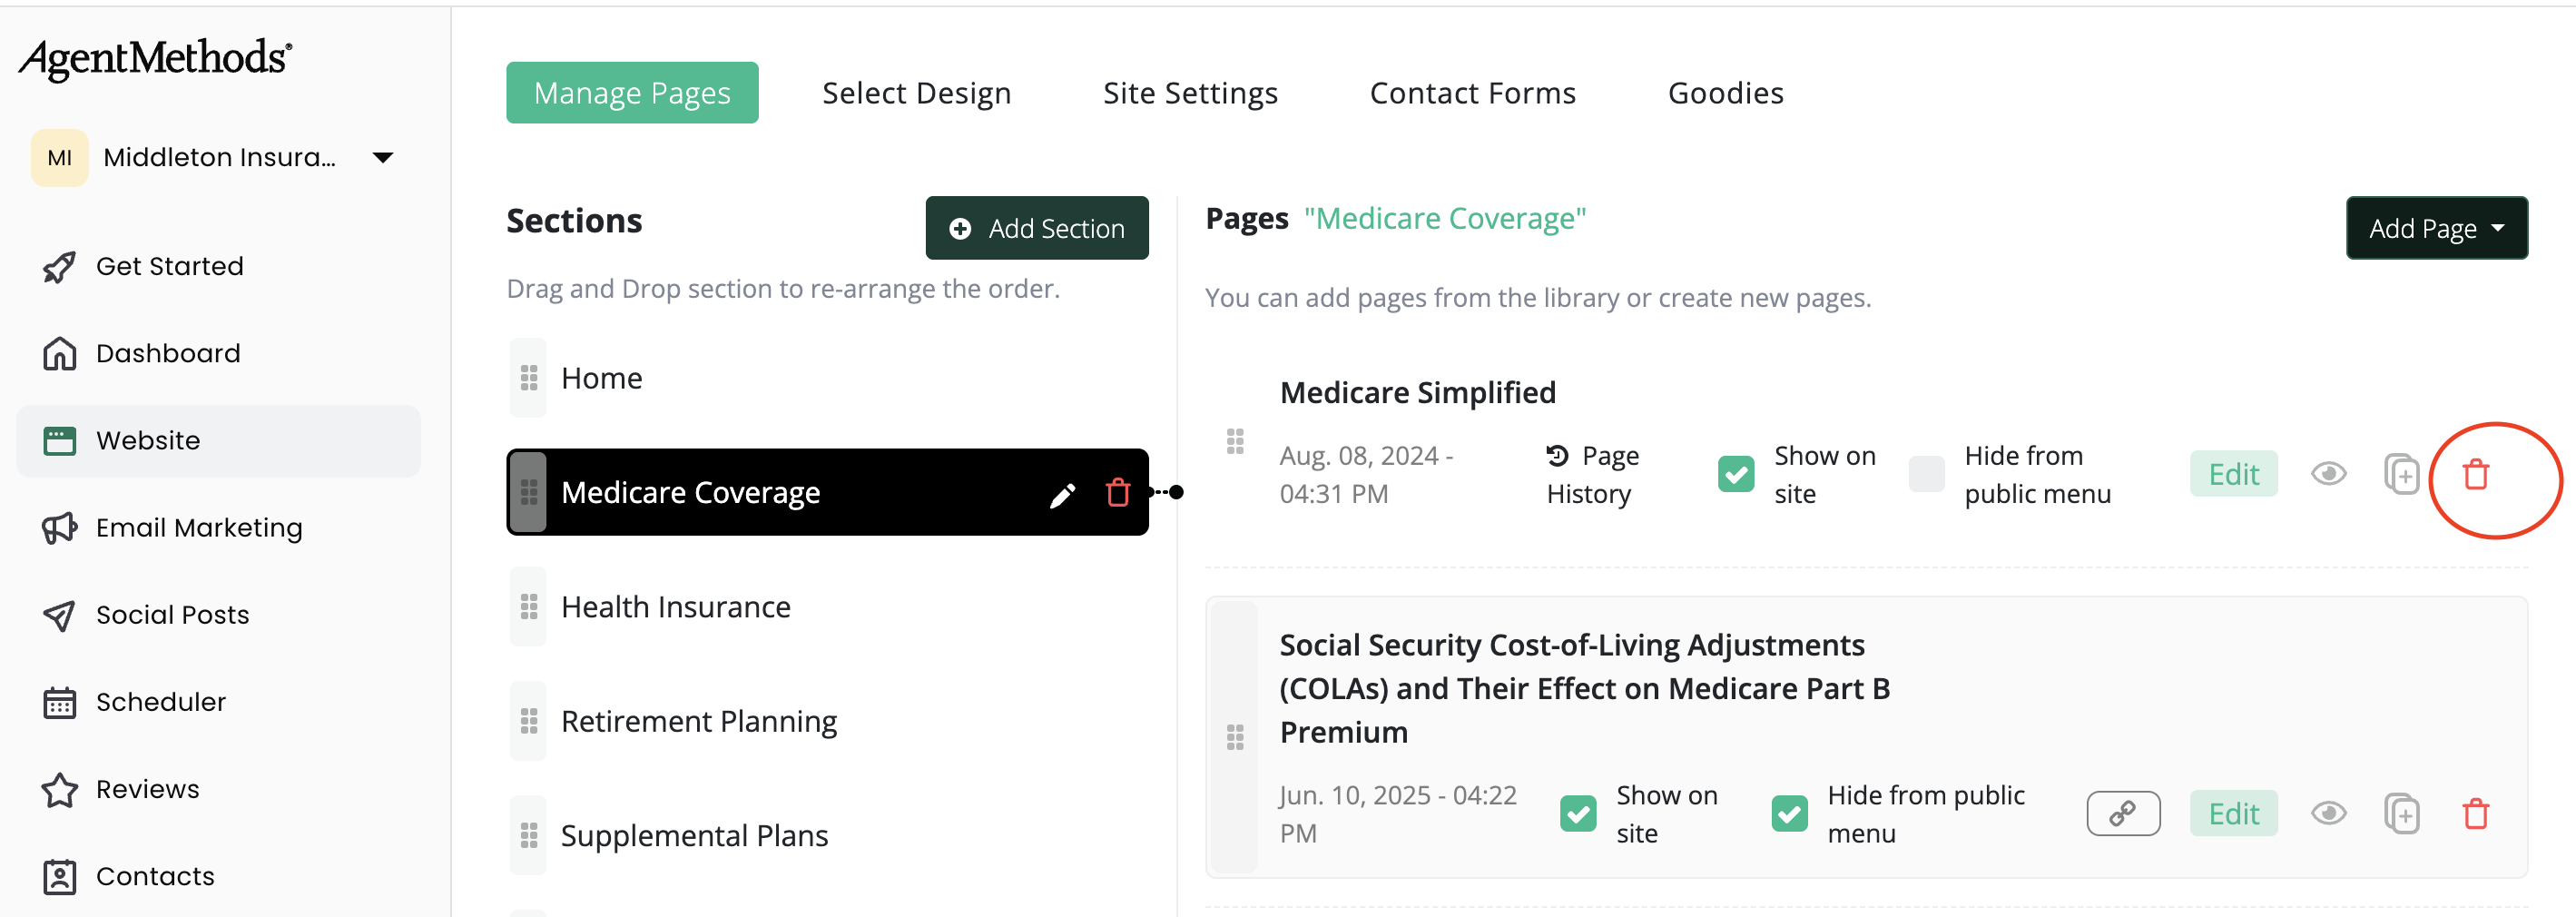
Deleted pages are stored in the recycle bin for 30 days and can be restored if needed.
Reorder Pages
You can change the order of pages within a section to better organize your website.
To reorder pages:
1. Go to Manage Pages
2. Choose the section where you want to reorder pages
3. Click and hold a page, then drag it to the new position
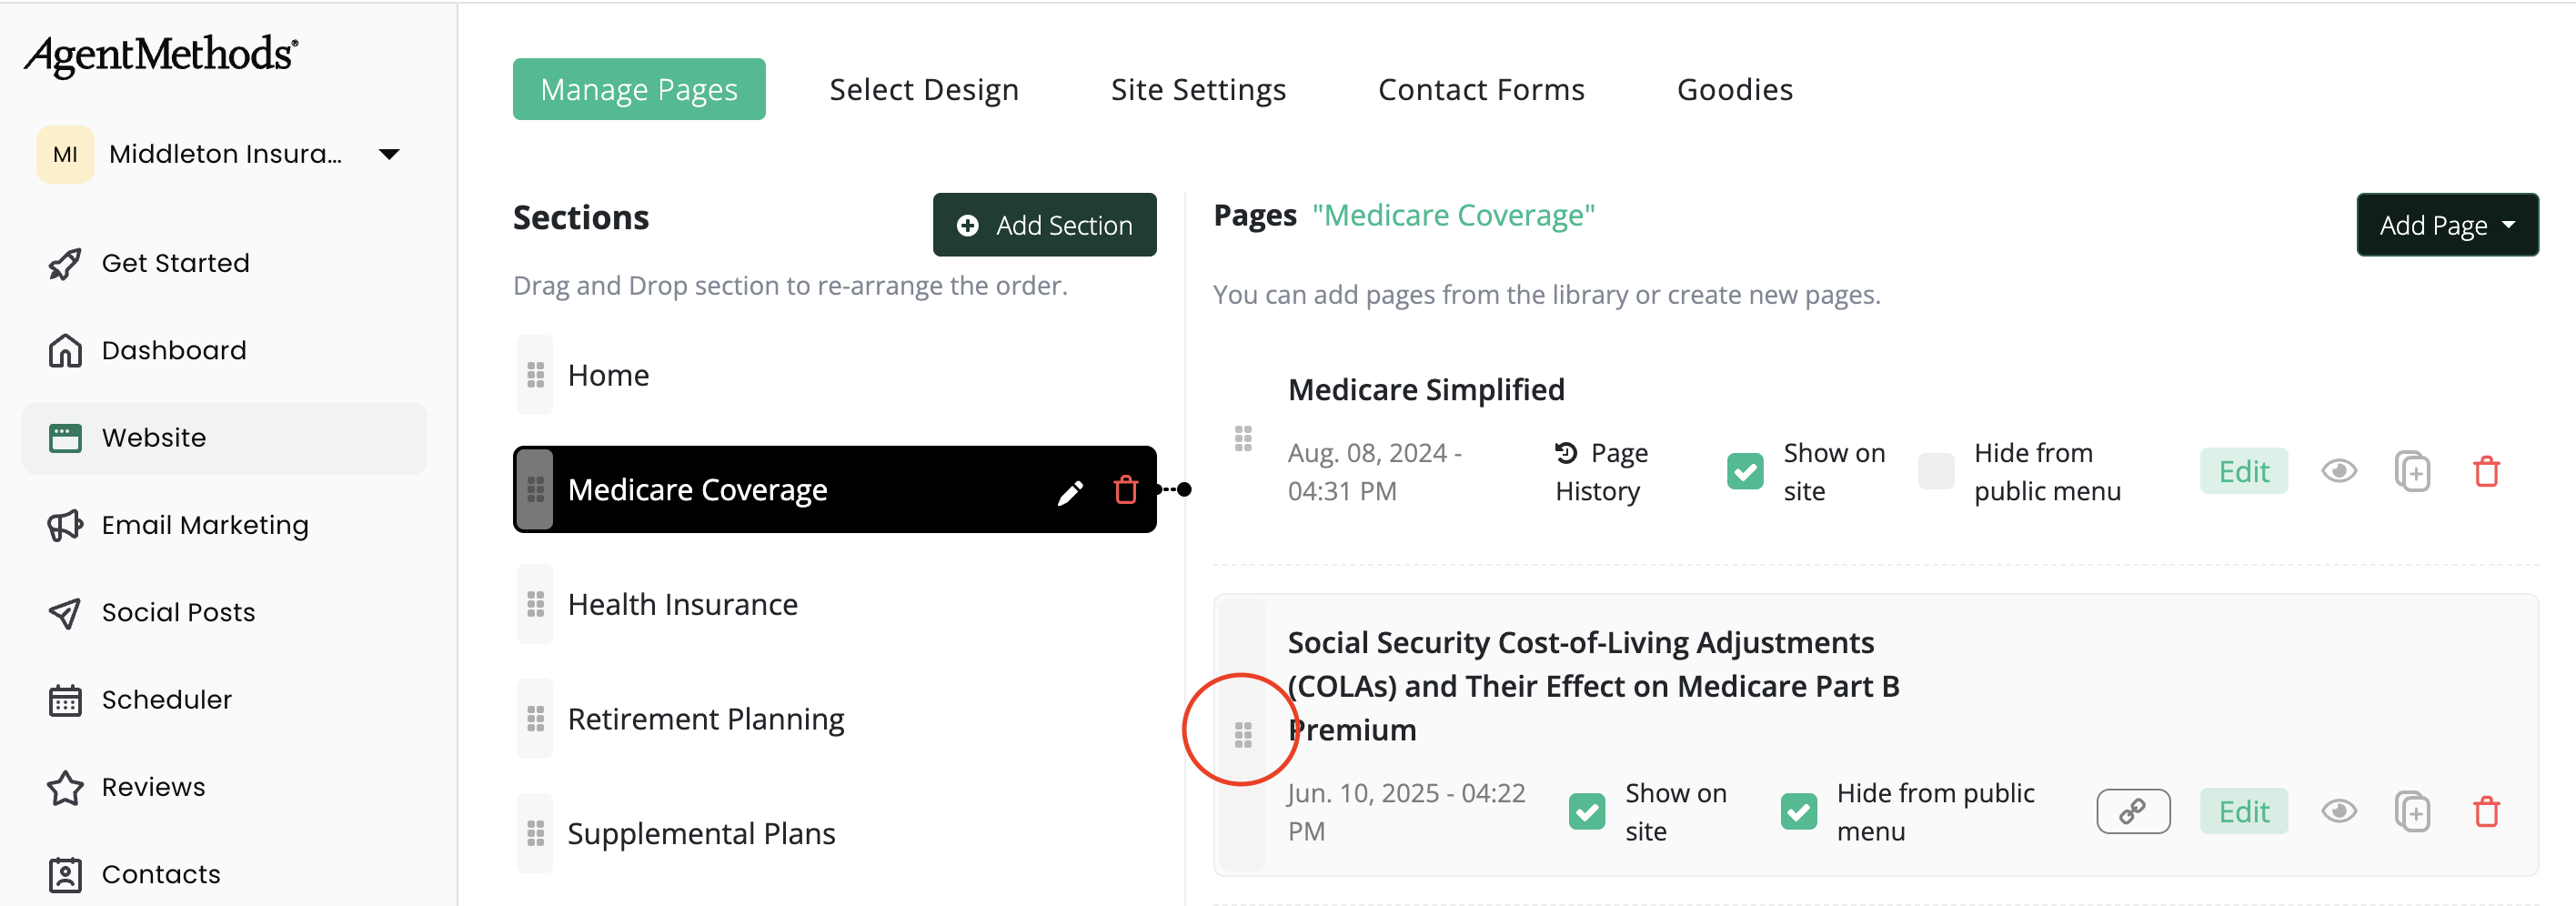
The order of pages can help guide visitors through your website, so consider placing your most important pages near the top.
Still have questions? Our support team is here to help. As you continue building your site, you can always return here to add new pages or reorganize your content 🙂🎉