Import Contacts
Adding contacts to your contact list allows you to send email campaigns, birthday emails, newsletters, and review requests. You can import contacts from a CSV or Excel file, or add them one at a time manually.
IN THIS ARTICLE
- Import Contacts from a File
- Required Columns
- Map Your Fields
- Review Invalid Contacts
- Add a Contact Manually
- Using a CRM Instead?
Tip: Importing a file is the fastest way to add multiple contacts at once.
Video Overview
Import Contacts from a File
To import contacts from a file:
1. Log in to your dashboard
2. Click Contacts in the left-hand menu
3. Click Add Import
4. Upload a CSV or Excel file
5. Click Next
You can either drag and drop your file into the upload area or click to upload it from your computer.

Required Columns
Your import file must include the following columns:
- First Name
- Last Name
A Phone Number column can also be included, but it is optional.
You can also include a Birthday column to enable automated birthday emails. Format birthdays as MM/DD/YYYY (two-digit month, two-digit day, four-digit year) for best results.
Make sure each column in your file is clearly labeled so the system can match the information correctly during import.
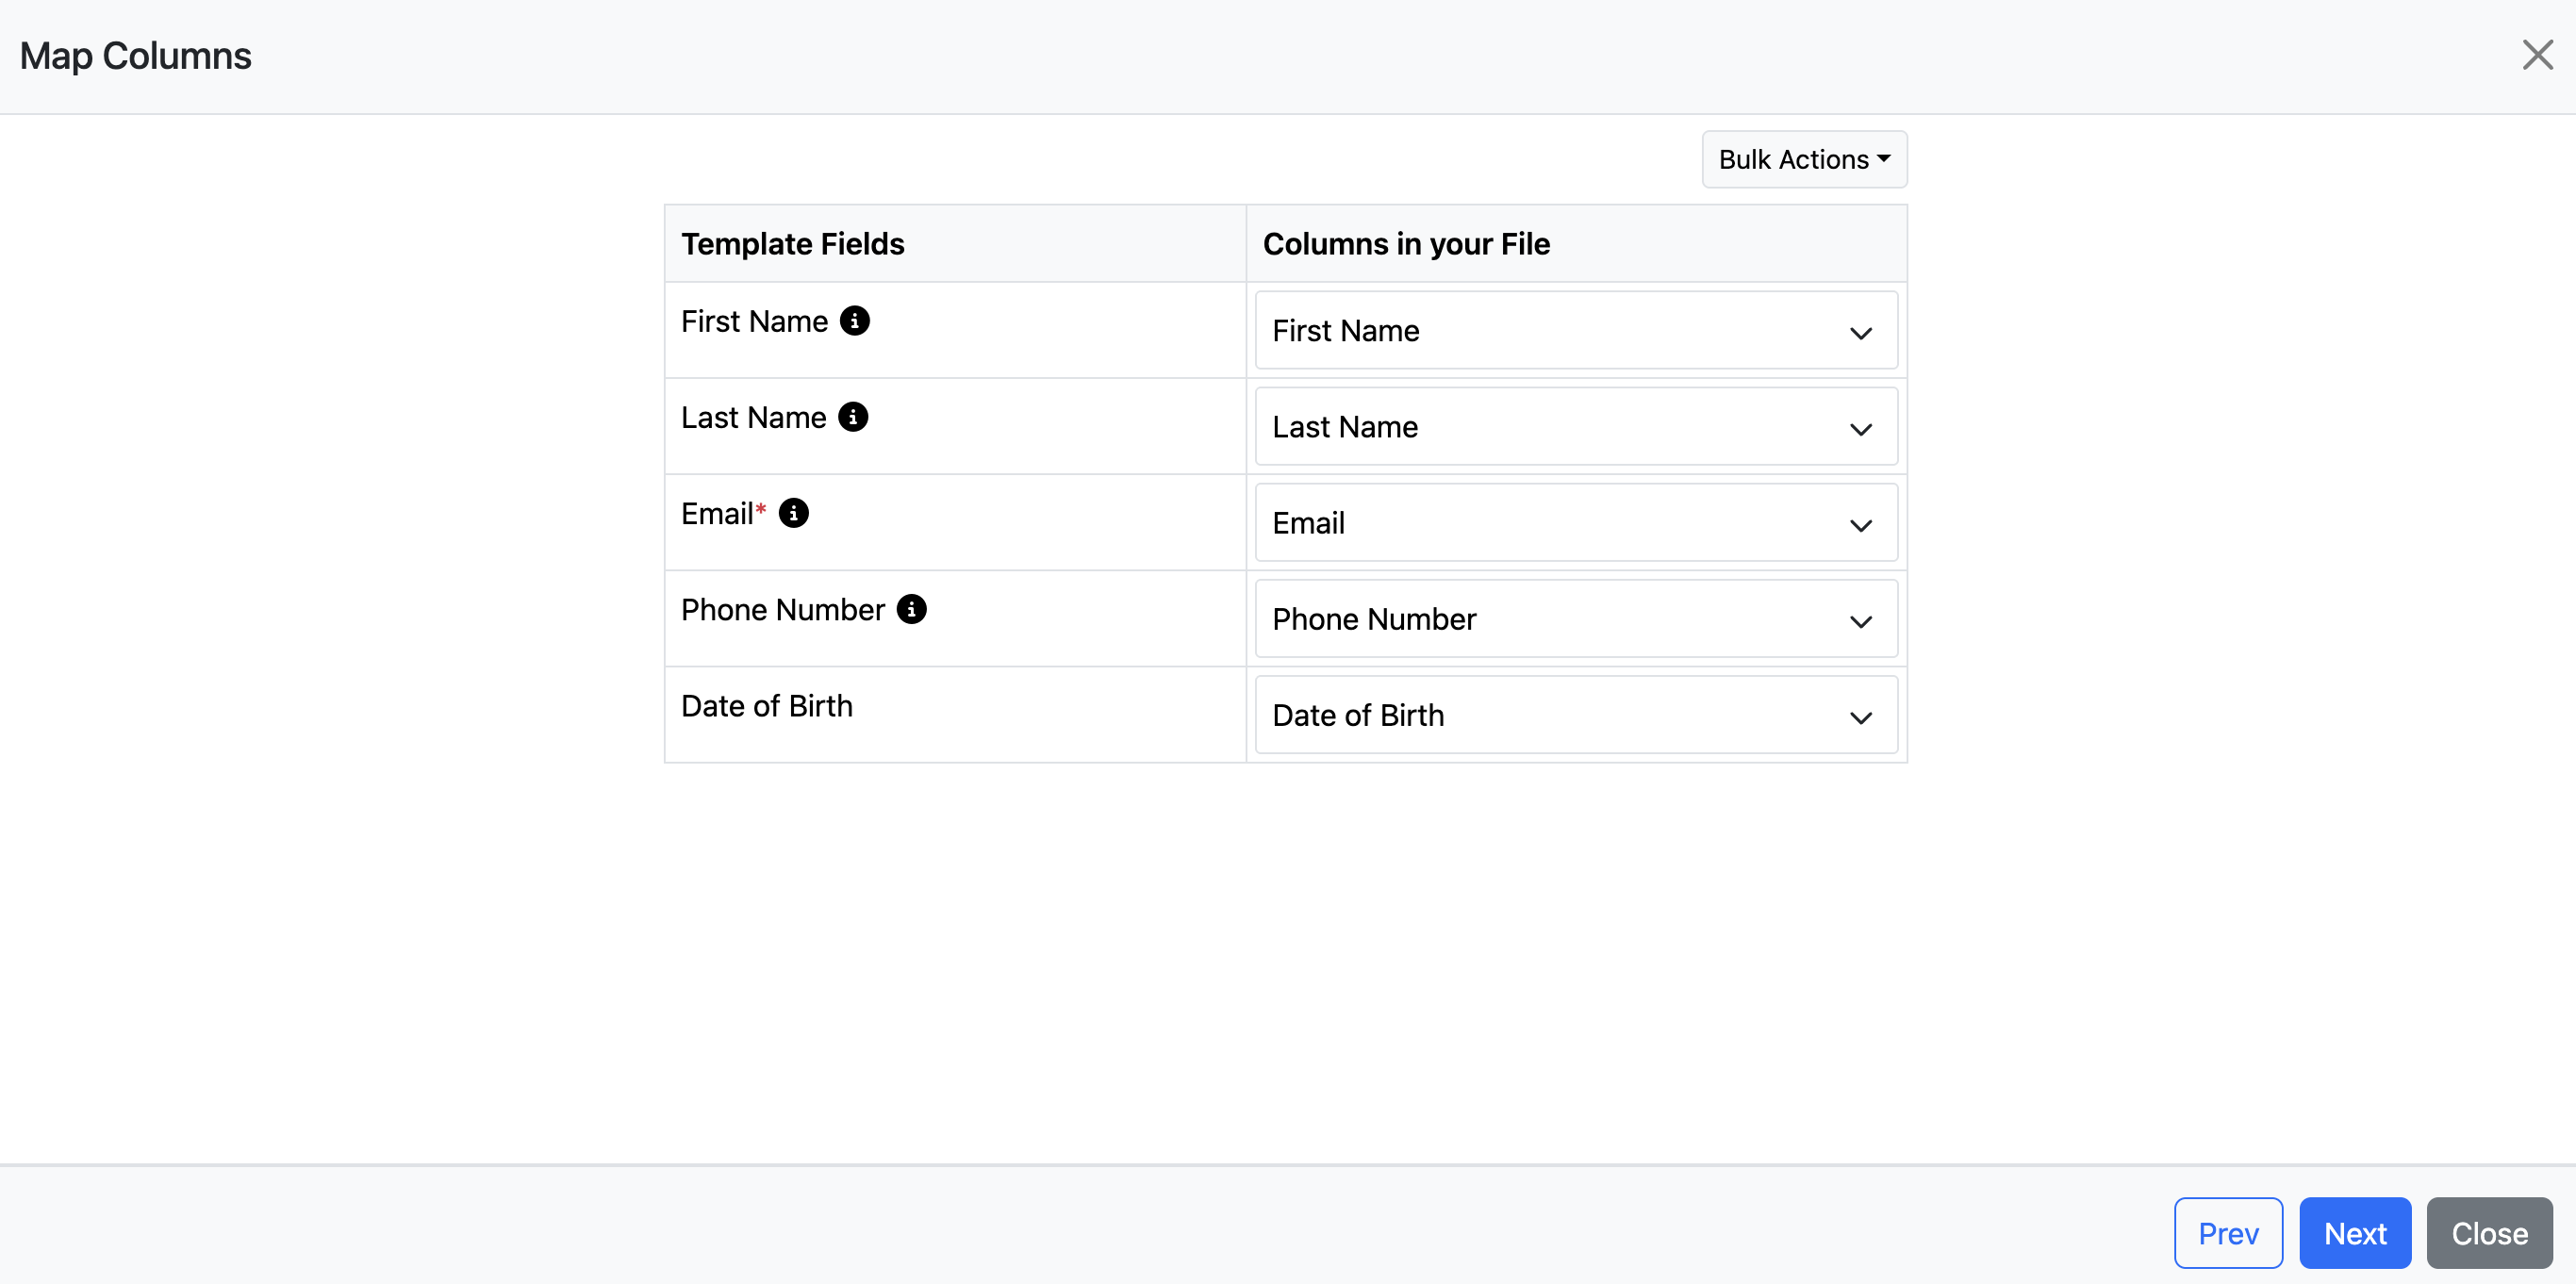
Map Your Fields
After uploading your file, you will be asked to map your fields.
This step makes sure the information in each column of your file matches the correct field in your contact list.
Review each mapped field carefully, then click Next.
Review Invalid Contacts
Before the import is completed, the system will check your file for any contacts that need attention.
If any contacts are flagged as invalid, you can:
- Update the contact information
- Remove the invalid contacts from the import
If you click on the invalid contacts list, you will be able to review the records and decide whether to fix or remove them.
Once you are ready, click Submit to complete the import.
If contacts are flagged as invalid, they may be missing required information or contain formatting issues that need to be corrected.
Add a Contact Manually
If you only need to add one contact, you can do that manually.
To add a contact manually:
1. Click Contacts in the left-hand menu
2. Click Add Contact
3. Enter the contact’s information
4. Click Save
This is a good option when you only have one or two contacts to add.
Using a CRM Instead?
If you manage your contacts in a CRM, you may be able to sync them into the platform automatically instead of importing a file.
Learn more: Connect a CRM to Import Contacts
Still have questions? Our support team is happy to help. Once your contacts are imported, you’ll be ready to use features like email marketing, birthday emails, newsletters, and review requests 🙂🎉