Create an Automated Email Campaign
Automated email campaigns allow you to stay in touch with your contacts throughout the year without creating each email one at a time.
You can choose who should receive the campaign, what topics the emails should cover, and when they should be sent each month.
IN THIS ARTICLE
- Video Walkthrough
- Open Email Automation
- Create an Automated Campaign
- Choose Which Contacts Will Receive the Campaign
- Choose Email Topics
- Choose When Emails Should Be Sent
- Add Additional Sends
- Edit an Existing Automated Campaign
- Add Holiday Emails
Automated campaigns make it easy to stay in front of your contacts with helpful emails sent on a regular schedule.
Video Walkthrough
Watch the video below for a step-by-step walkthrough of setting up an automated email campaign.
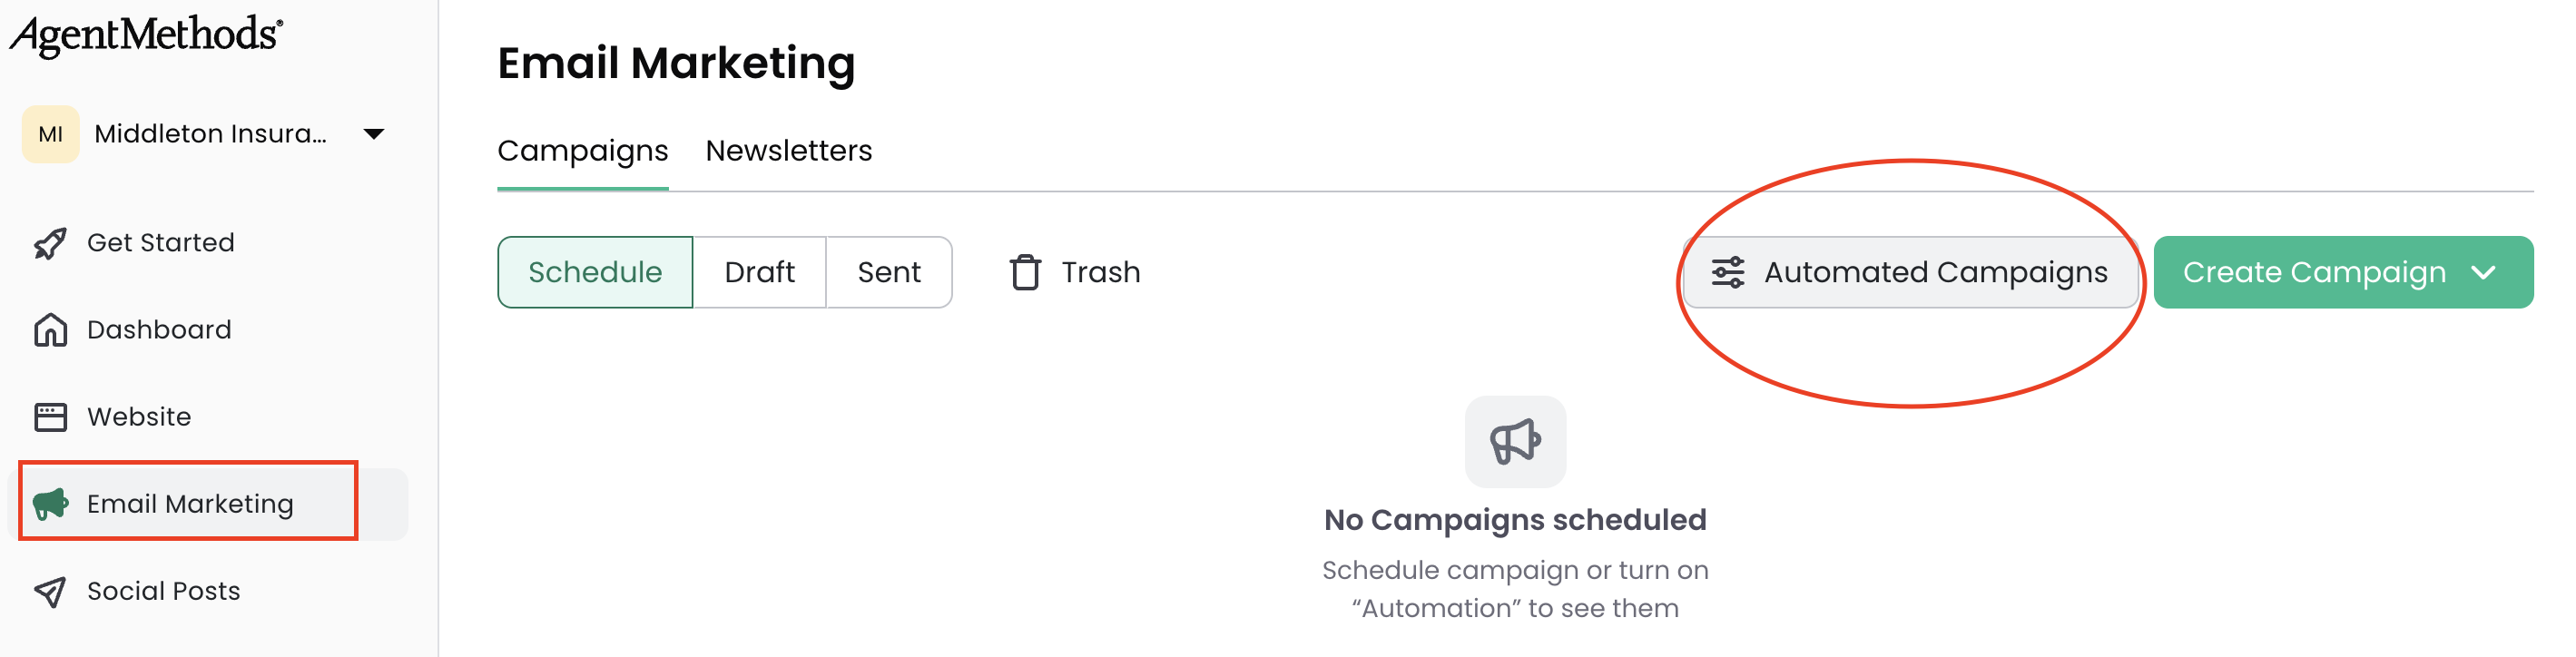
Open Email Automation
To get started:
1. Log in to your dashboard
2. Click Email Marketing in the left-hand menu
3. Click Automated Campaigns
If you have already created campaigns, you will see them listed here. If this is your first time setting up email automation, you will be guided through the setup process automatically.
Create an Automated Campaign
If you would like to add a new automated campaign, click Create Automated Campaign.
You will then be guided through the campaign setup process.
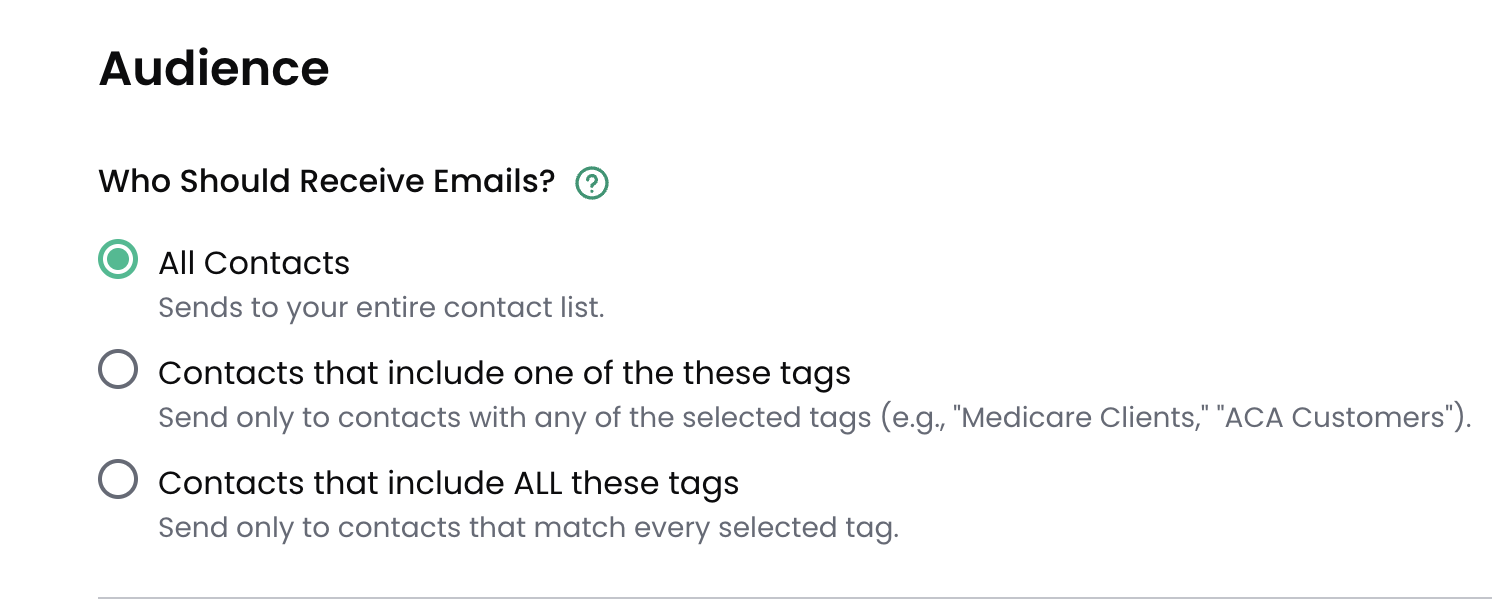
Choose Which Contacts Will Receive the Campaign
The first step is choosing who should receive the campaign.
You can choose from:
- All contacts
- Contacts that include one of these tags
- Contacts that include all of these tags
This allows you to target the campaign to the right group of contacts.
If you plan to segment contacts using tags, make sure your tags are already set up before creating the campaign.
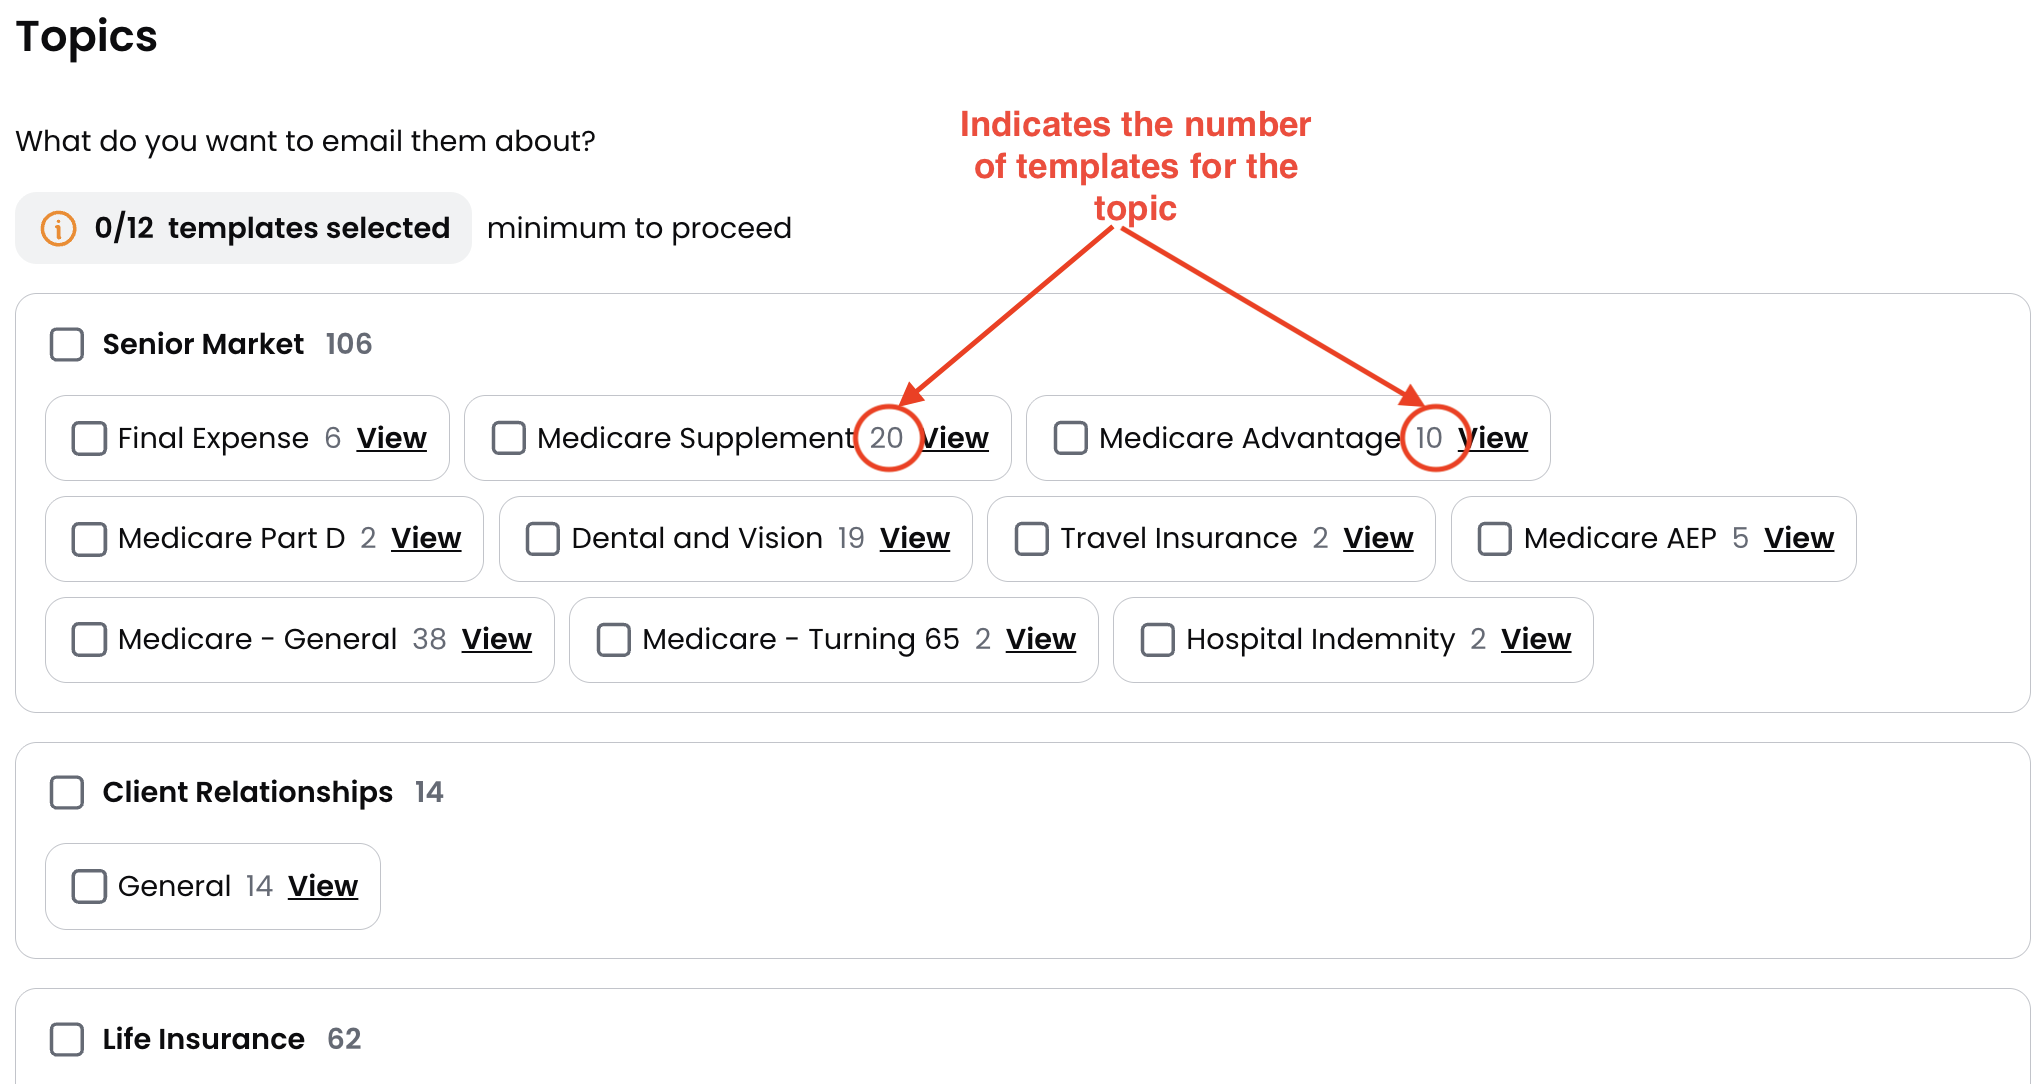
Choose Email Topics
Next, choose the topics you want your automated campaign to cover.
Each topic contains a number of email templates. The number shown next to each topic represents how many templates are available for that topic.
Because automated campaigns send emails monthly, the topics you select must include at least 12 templates in total.
Choose When Emails Should Be Sent
In the next step, choose when the campaign should send each month.
Use the dropdown options to select the send date you want for the campaign.
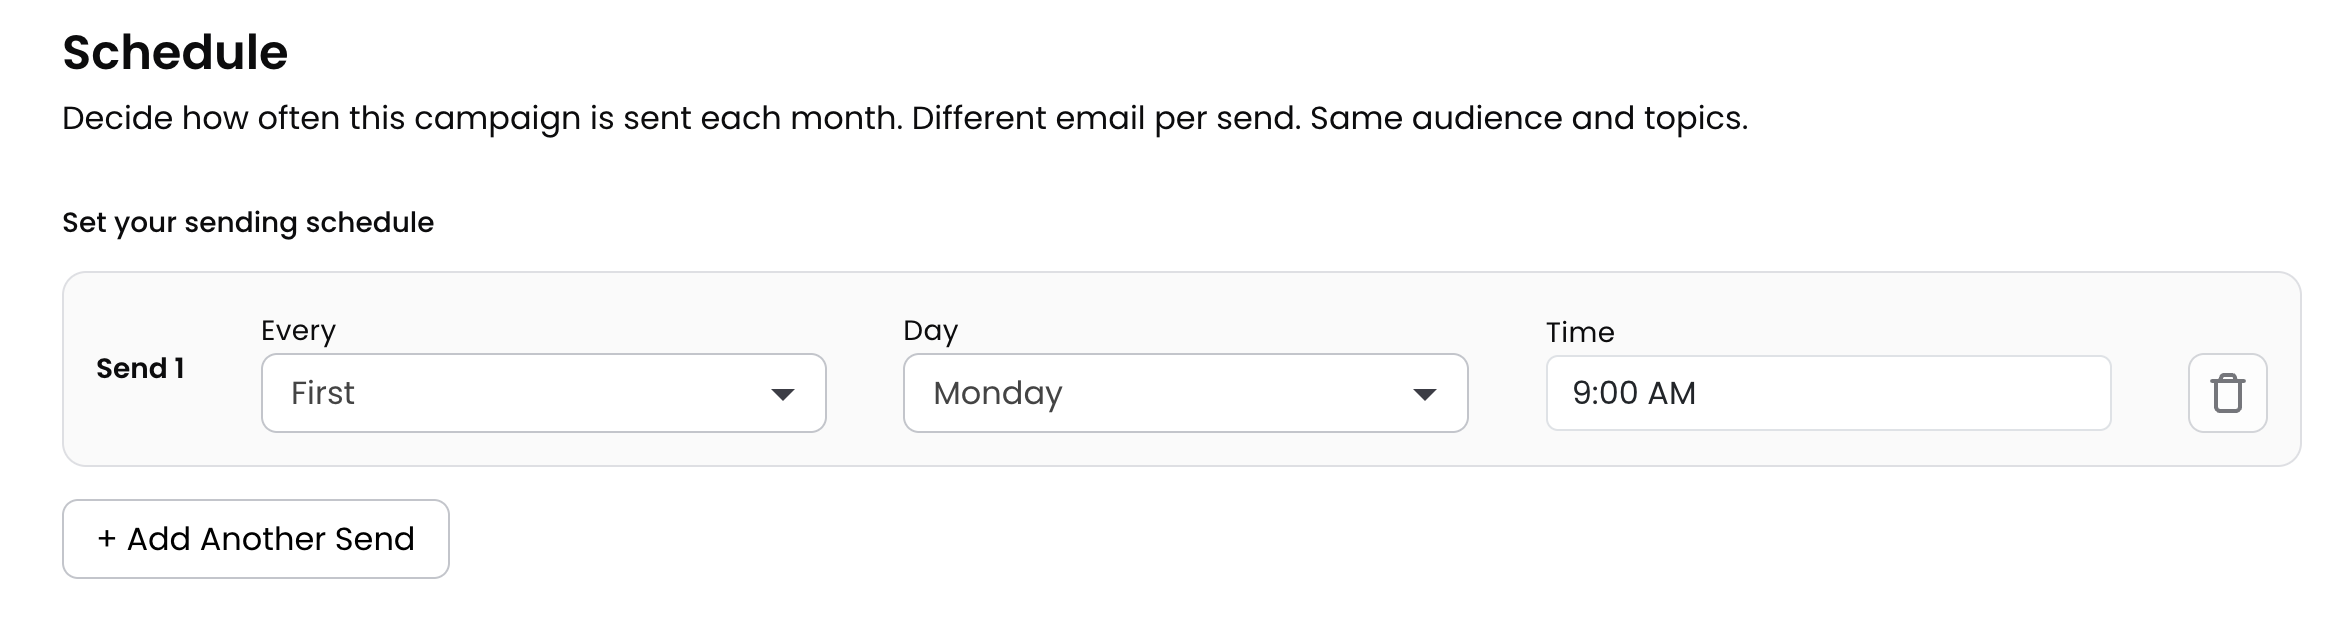
Add Additional Sends
Each automated campaign can include up to 3 sends.
If you want to add another send to the same campaign, click + Another Send.
Additional sends will use the same audience and topics, but you can choose a different send date for each one.
If you need different audiences or different topics, create a separate campaign instead.
When you are finished, click Create and Launch Campaign.
You can include up to 3 sends in a single campaign, but all sends within that campaign will use the same audience and topics.
Edit an Existing Automated Campaign
You can edit an automated campaign at any time by clicking Edit next to the campaign.
This allows you to update the contact selection, email topics, or timing.
If you only need to change when the emails are sent, you can update the timing and then save your changes.
Add Holiday Emails
You can also schedule holiday emails from the Automated Campaigns page.
Scroll to the Holiday Topics section and click + Add Holiday Email.
From there, you can:
- Choose which contacts should receive the holiday emails
- Select which holidays you want to include
When finished, click Update and Launch Campaign.
Still have questions? Our support team is happy to help 🙂